Halliburton Science-at-Home Kits
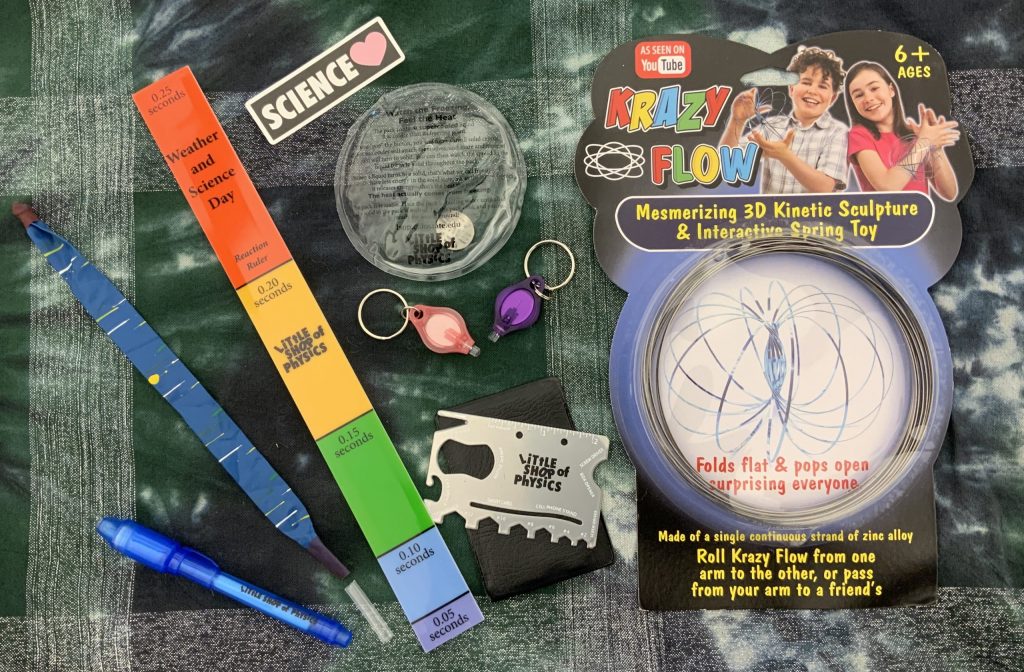
These kits are sponsored by the Halliburton Foundation for K-12 students on Native American reservations; as of now kits have been shipped to Pine Ridge and Wind River. The activities provide open-ended inquiry-based experiments that students can do in class or at home. Younger students will need parent or teacher guidance while older students can work on these experiments independently.
While the materials are appropriate for all ages, differentiated activities are provided based on grade level: elementary/middle school (pdf) and middle/high school (pdf). Activities with notes for the teacher (or parent) are also available — please email cns_lsop@colostate.edu to receive these notes or if you have any questions about the Halliburton Science-at-home kits.
Topic: Electricity
Activity: Static Sensor assembly
Level: All
Materials (in a plastic bag in your kit):
- one plastic bag with a popsicle stick
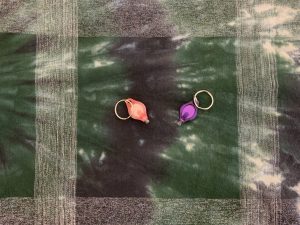
- a small neon lightbulb
- 2 pieces of aluminum tape
Before you begin:
You will need to make your static sensor.
- Take the small lightbulb and bend one wire to the left and bend one to the right so that the bulb is sitting in the middle.
- Lay the popsicle stick flat and place the lightbulb in the middle of the stick with the left wire resting on the left side of the stick and the right wire resting on the right side of the stick.
- Peel the backing off one of the aluminum rectangles and place it over one of the lightbulb wires and the popsicle stick. Bend the rest of the aluminum to the back side of the popsicle stick. Now repeat on the other side of the stick.
Activity: Static Sensor exploration
Level: Elementary School/Middle School
What to do:
Have you ever walked across a room, touched a doorknob or another person and felt a shock? If so, this activity is for you! You will be using the static sensor you just made to investigate static electricity. With the static sensor, you won’t receive a shock, but you will see a neon light flash. Make the room you are in as dark as you can so it will be easier to see the flash. Hold your static sensor by touching the aluminum on only one end of the popsicle stick and move about the room. Scuff your feet as you go and touch the other aluminum end of the popsicle stick to different objects in the room.
Explain:
What type of items caused the bulb to light up? What type of objects didn’t cause the bulb to light up? Did anything surprise you about this activity? Why do you think you need to scuff your feet on the floor? Why didn’t you feel a shock? Think about and discuss.
Extend:
Try finding other ways to build up static charges. Could you build up a charge by jumping on the floor several times? What happens if two people hold hands, scuff their feet, and are lined up person, person, static sensor, doorknob? What happens if one person holds one end of the static sensor and the other person holds the other end while they both scuff their feet? Would the static sensor light if you rubbed a balloon on your hair and then put the static sensor on the balloon?
Activity: Static Sensor exploration
Level: Middle School/High School
What to do:
Use the static sensor you just made to investigate static electricity. With the static sensor, you won’t receive a shock, but you will see a neon light flash. Make the room you are in as dark as you can so it will be easier to see the flash. Hold your static sensor by touching the aluminum on only one end of the popsicle stick and move about the room. Shuffle your feet as you go and touch the other aluminum end of the popsicle stick to different objects in the room.
Explain:
What type of items caused the bulb to light up? What type of objects didn’t cause the bulb to light up? Did anything surprise you about this activity? Why do you think you need to scuff your feet on the floor? Why didn’t you feel a shock? Think about it and discuss.
Extend:
Try finding other ways to build up static charges. Could you build up a charge by jumping on the floor several times? Can you use two people to light the bulb? Would the static sensor light if you rubbed a balloon on your hair and then put the static sensor on the balloon?
Topic: Energy/Energy Transfer
Activity: Physics Flyer
Level: Elementary School/Middle School
Materials:
- Physics Flyer – One propeller and one plastic stick
What to do:
Attach the plastic stick to the propeller blade. Put the stick between your two hands, with the propeller above your hands. Tip it slightly forward and away from anyone or anything around it. Quickly push your right hand forward past your left hand. The physics flyer starts spinning and lifting higher in the air.
Explain:
What did you do to get the Physics Flyer to move and leave your hands? What type of energy does the flyer have after you let it go? What happens when the flyer rises to its highest point? Is it moving? What kind of energy does it have then? How does the energy change as the flyer comes back down? Think about and discuss.
Extend:
Launch the physics flyer different ways. What happens if you release it slowly? What if you release it quickly? Try the propeller below your hands. What happens if you release it sideways?
More details:
Read more about the topic of energy:
Activity: Physics Flyer
Level: Middle School/High School
Materials:
- Physics Flyer – One propeller and one plastic stick
What to do:
Attach the plastic stick to the propeller blade. Put the stick between your two hands, with the propeller above your hands. Tip it slightly forward and away from anyone or anything around it. Quickly push your right hand forward past your left hand. The physics flyer will start spinning and will fly in the air.
Explain:
Discuss the energy transfers and transformations that take place during the physics flyer’s flight. What kind of energy does it have when you hold it at rest? What type of energy does it have when it just leaves your hand? When it reaches the top of it’s path? When it lands on the ground?
Extend:
Launch the physics flyer different ways. What happens if you release it slowly? What if you release it quickly? Try the propeller below your hands. What happens if you release it sideways? Discuss your results in terms of energy.
Topic: Force and Motion
Activity: Rocket Balloon
Level: Elementary School/Middle School
Materials:
- One rocket balloon and one small piece of straw
What to do:
Gently stretch the balloon, so it will be easier to inflate. Place the small piece of straw just inside the opening of the balloon. Carefully hold the balloon where it stretches around the straw, and blow it up. Be careful not to fill it all the way up or it may burst! Remove the straw and quickly pinch the end of the balloon to keep the air from coming out. Aim the balloon up and let it go. What happens?
Explain:
What direction did the air escape from the balloon (up, down, to the left, to the right, etc.)? What direction did the front of the balloon travel at first? Did the balloon change course? What do you think caused it to change direction? Why do you think the balloon made sounds as it traveled around the room? Think about this and discuss.
Extend:
Inflate the balloon again and launch it sideways. Now try pointing it down and release it. What did you observe? Is there a correlation between the direction the air escapes and the direction the balloon moves forward?
More details:
We filmed an episode of LSOP Live on Energy where we filled rocket balloons with water (13:07).
Activity: Rocket Balloon
Level: Middle School/High School
Materials:
- One rocket balloon and one small piece of straw
What to do:
Gently stretch the balloon, so it will be easier to inflate. Place the small piece of straw just inside the opening of the balloon. Carefully hold the balloon where it stretches around the straw and inflate it. Remove the straw and quickly pinch the end of the balloon to keep the air from coming out. Aim the balloon up and let it go. What happens?
Explain:
What direction did the air escape from the balloon (up, down, to the left, to the right, etc.)? What direction did the front of the balloon travel at first? Did the balloon change course? What do you think caused it to change direction? Why do you think the balloon made sounds as it traveled around the room? What is the agent that applies a force to the balloon?
Extend:
Inflate the balloon again and launch it sideways. Now try pointing it down and release it. What did you observe? Is there a correlation between the direction the air escapes and the direction the balloon moves?

Topic: Force and Motion/Pressure
Activity: Bernoulli Air Bag
Level: All
Materials:
- Air Bag
- A sheet of paper
What to do:
Take your long, colorful plastic bag and try to inflate it with one breath. First take a deep breath and put your bag to your lips and exhale. Now, take a deep breath, hold the bag open about 10 inches (25 cm) away from your mouth, and blow in a sharp stream. Quickly close the bag with your hand. Try each method a couple of times.
Explain:
Is it more effective to inflate the bag by holding it to your lips or by holding it farther away? Why do you think this is the case? Where does the air come from or go? Think about and discuss.
Extend:
Hold a sheet of paper by the end with both hands just below your mouth. Blow sharply across the top surface of the paper. Can you see the paper rise up? This is called the Bernoulli Effect; the fast moving air above the paper has lower pressure than the air below the paper, so it rises.
More details:
For more more details about pressure, force, and motion, check out this resources:
Topic: Force & Motion/Density and Buoyancy
Activity: Cartesian Diver assembly
Level: All
Materials (Use your own materials):
- From home: One ketchup packet
- From home: One 1 or 2 liter plastic soda bottle
Before you start:
- Test your ketchup packet. Put the ketchup packet into a bowl of water and see if it sinks or floats. If it sinks, it won’t work for this experiment and you will need to try other ketchup packets.
- When you find a packet that floats, but just barely floats, fill your bottle with water. Fold your ketchup packet in half so it is long and skinny, and gently push it into the bottle. Add more water so that it fills up the neck of the bottle, and then screw the cap on tightly.
Activity: Cartesian Diver exploration
Level: Elementary School/Middle School
What to do:
You are going to try to make the ketchup packet sink! Squeeze the bottle with both of your hands and see what happens. (If you can’t get it to sink, ask someone to squeeze the bottle with you. If it still doesn’t sink, you may have to try another ketchup packet).
Explain:
Why does the ketchup packet float in the water? Why does it sink when you squeeze the bottle? When the packets are made, something gets trapped in the packet with the ketchup. What do you think it might be? Think about and discuss.
Extend:
Can you make the packet only go down to the middle of the bottle? What other things could you try to sink and float in the bottle? Would a tiny balloon with just a bit of air work?
Activity: Cartesian Diver exploration
Level: Middle School/High School
What to do:
You are going to try to make the ketchup packet sink! Squeeze the bottle with both of your hands and see what happens. If you can’t get it to sink, try two people squeezing at the same time. If it still doesn’t sink, you may have to try another ketchup packet, or try attaching a small weight such as a paperclip to the ketchup packet.
Explain:
Why does the ketchup packet float in the water? Why does it sink when you squeeze the bottle? Explain this in terms of density and buoyancy.
Here’s a hint: ketchup is made of mostly water, which is not compressible. Is there something else that is compressible that could be trapped inside of the ketchup packet?
Extend:
Can you make the packet only go down to the middle of the bottle? What other things could you try to sink and float in the bottle? Would a tiny balloon with just a bit of air work?
Topic: Force & Motion/Density and Buoyancy
Activity: Density Bottles
Level: All
Materials:
- Isopropyl alcohol (also called rubbing alcohol)
- Salt
- Water
- Small bottle with a lid (such as a used water bottle)
- Funnel (optional)
- Food coloring or the tube from a highlighter marker
What to do:
Pour the isopropyl alcohol into the bottle and add water. For 70% isopropyl alcohol, try starting with 3 parts alcohol to 1 part water; for 91% or 99% isopropyl alcohol, you can add more water. A funnel may be helpful if you have one. Add salt to the bottle until it no longer dissolves. Put the lid on the bottle and shake vigorously. Give it a moment to settle and you should see two separate layers: one is salt water and the other is alcohol. If this doesn’t happen try adding more salt.
Once you have to separate layers, you can adjust the amounts of water and alcohol; you may need to add more salt.
Explain:
When you buy 70% isopropyl alcohol, it’s a solution: the alcohol is dissolved in 30% water. What happens to the solution of alcohol and water when you add salt? Which layer is the alcohol and which is the saltwater. Which is more dense, the alcohol or the salt water? Think about and discuss.
Extend:
Try adding a drop of food coloring to the mixture, or remove the tube from the back of a highlighter marker and squeeze a drop of this fluid into the water. Does the color dissolve in the saltwater, the alcohol or both?
Topic: Light & Color/Optics
Activity: Rainbow Glasses
Level: Elementary School/Middle School
Materials:
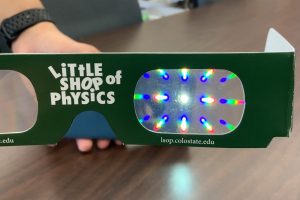
- Rainbow (diffraction) glasses
- Colored filters such as the included 3D glasses (cyan/red)
- Various light sources such as the included small flashlight & the LED light
What to do:
Explore different light sources while wearing the rainbow glasses; these glasses reveal all of the colors that the light is made of. Find light sources that contain the entire visible spectrum. Can you find light sources that only contain parts of the visible spectrum with some colors missing?
Safety Warning: Do not look directly at the sun!
Explain:
Which light sources contain the entire visible spectrum of red, orange, yellow, green, blue, and violet light? Which light sources only give you pieces of the visible spectrum? Think about and discuss.
Extend:
While wearing the rainbow glasses, find a light source that gives the entire spectrum. Slowly place a colored filter between the lightbulb and your eye. For a filter, you can use the red and cyan glasses and also, anything else that is colored and allows some light to go through it. Try colored plastic or glass. Describe what happens to the spectrum when you do this. For each filter, which colors are absorbed? Which colors are transmitted?
More details:
For more information and experiment ideas about the electromagnetic waves (light) check out these links:
Activity: Selective Transmission and the Visible Spectrum
Level: Middle School/High School
Materials:
- Rainbow (diffraction) glasses
- Colored filters such as the included 3D glasses (cyan/red)
- Various light sources such as the included small flashlight
What to do:
Explore different light sources while wearing the rainbow glasses; these glasses reveal all of the colors that the light is made of. Find light sources that contain the entire visible spectrum. Can you find light sources that only contain parts of the visible spectrum with some colors missing?
Do not look directly at the sun!
Explain:
Which light sources contain the entire visible spectrum of red, orange, yellow, green, blue, and violet light? Which light sources only give you pieces of the visible spectrum?
Extend:
While wearing the rainbow glasses, find a light source that gives the entire spectrum. Slowly place a colored filter between the lightbulb and your eye; for a filter, you can use anything that is colored and allows some light to go through it, such as colored plastic or glass. Describe what happens to the spectrum when you do this. For each filter, which colors are absorbed? Which colors are transmitted?
Topic: Light & Color
Activity: Red/Cyan 3D Glasses
Level: Elementary School/Middle School
Materials:
- One pair of Red and Cyan Glasses
- One card with 3 baseball images
What to do:
Look at the 3 images on the card without the glasses. Do the images seem blurred to you? What about the writing? Do you notice certain colors on the catcher’s mitt and the pitcher? With the red lens in front of your left eye and the cyan lens in front of your right eye, and both eyes open, look at the card. What do you notice now about the three different pictures? Do the images look different than what you see in a regular photograph?
Explain:
Look at a light bulb with just the red filter in your glasses. What color light do you see? The color you see is what the red filter transmits. Using just the red filter, look at an object that is red, one that is green, and one that is blue. What did you notice? Which colors disappear? Which colors look dark? Now look at the light bulb with the cyan filter. What color light do you see? Do the same activity, using the cyan filter to look at the red, green and blue objects. What is different from the red filter? Think about and discuss.
Extend:
With your parents permission, look at more images. We did a search on google for “cyan and red images to look at”. You can also search for “cyan and red anaglyph images to look at”. We found some interesting ones of the moon, planets (Mars), animals, mountain views, and more.
Topic: Light & Color/Optics
Activity: Multiplex Messages
Level: Elementary School/Middle School
Materials:
- Colored filters such as the included 3D glasses (cyan/red)
- Colored pens, crayons, and pencils (such as the included red, yellow, blue green)
- Paper
What to do:
Write a message or draw a picture on paper using many different colored pens, crayons, or pencils (such as the colored pencils included with your kit). Look at the message through the different colored filters such as the red/cyan 3D glasses in your kit. Look only through the red side of the glasses at the message or drawing. Write down what colors disappear when using the red filter. Now look only through the cyan side of the glasses and write down which colors disappear.
Explain:
Can you predict which colors will disappear or become harder to see when you look through the different colored filters? Are they colors that are similar to the filter or ones that are different? Which colors are transmitted through the red or cyan filter and disappear? Which colors are absorbed and appear dark? Think about and discuss.
Extend:
Write multiple messages or draw multiple pictures on top of each other so that you can see one clearly with a certain colored filter and a different message/picture with a different colored filter. By using this technique, you can put multiple messages on the same sheet of paper. It’s almost like a secret code!
Activity: Multiplex Messages
Level: Middle School/High School
Materials:
- Colored filters such as the included 3D glasses (cyan/red)
- Colored pens and pencils (such as the included red, yellow, blue green)
- Paper
What to do:
Write a message or draw a picture on paper using many different colored pens or pencils (such as the colored pencils included with your kit). Look at the message through the different colored filters such as the red/cyan 3D glasses in your kit. Note which filters make which colors disappear.
Explain:
Can you predict which colors will disappear or become harder to see when you look through different colored filters? Is it colors that are similar to the filter or ones that are different? Which colors are transmitted through each filter and which colors are absorbed?
Extend:
Write multiple messages or draw multiple pictures on top of each other so that you can see one clearly with a certain colored filter and a different message/picture with a different colored filter. By using this technique, you can put multiple messages on the same sheet of paper.
Topic: Light & Color/Optics
Activity: Pulfrich Pendulum
Level: Elementary School/Middle School
Materials:
- Pulfrich glasses – One lens is clear and one lens is dark
Before you begin: (Use your own materials)
You will need to make a pendulum. So, what is a pendulum? A pendulum is a weight that hangs below a string and it can swing side to side. Here are some ideas:
- A brightly colored ball or object attached to a long string, like yo-yo at the end of it’s string.
- A brightly colored glove that a helper will wear on their hand.
You will also need something dark below the pendulum that doesn’t move. This could be a chair, a book, a scrunched up piece of paper, etc. Use your imagination and try different things!
What to do:
Have someone hold the string on your pendulum up high so the top of the string doesn’t move. Put the dark object under the weight on the pendulum. Put it close to the weight, but not touching. Have your helper move the weight to one side and let it go. It should swing from side to side. As it slows down, your helper will have to repeat this so you can observe with your glasses on. Step far back and watch as the pendulum swings. Now put on your Pulfrich glasses (the paper glasses with one dark lens from your kit). What do you see happening? Now turn your Pulfrich glasses around so the dark lens is covering your other eye. Do you see anything different happening?
Explain:
Why do you think the weight looks like it moves a certain way when you look at it without the glasses and then changes and moves another way with the glasses on? What do you think will happen if you put on a pair of sunglasses (without the Pulfrich glasses) and watch the pendulum swing? What happens if you put the pair of sunglasses over the Pulfrich glasses? Discuss.
Extend:
Try to find other pendulums. If you have a swing, have a friend swing back and forth. What do you think you would see if you watched from the side as your friend swings and you put your glasses on? Have a friend put on a brightly colored glove and have them move their forearm and hand from the elbow, back and forth over a dark object.
Activity: Pulfrich Pendulum
Level: Middle School/High School
Topic: Optics: Sight and Timing
Materials:
- Pulfrich glasses – One lens is clear and one lens is dark
- Materials to make a pendulum (a string and a weight)
What to do:
You will need to make a pendulum. A pendulum is a weight that hangs below a string and it can swing side to side. A ball or a yo-yo at the end of it’s string could be used for a pendulum.
This activity is easiest with two people. Have the first person hold the string, pull the pendulum to the side and release it so it moves left and right. Step far back and watch as the pendulum swings. Now put on your Pulfrich glasses. What do you see happening? Now turn your Pulfrich glasses around so the dark lens is covering your other eye. Do you see anything different happening?
Explain:
Why do you think the weight looks like it moves a certain way when you look at it without the glasses and then changes and moves another way with the glasses on? What do you think will happen if you put on a pair of sunglasses (without the Pulfrich glasses) and watch the pendulum swing? What happens if you put the pair of sunglasses over the Pulfrich glasses? Discuss.
Extend:
Try to find other pendulums. If you have a swing, have a friend swing back and forth. What do you think you would see if you watched from the side as your friend swings and you put your glasses on? Have a friend put on a brightly colored glove and have them move their forearm and hand from the elbow, back and forth over a dark object. Can you see this effect anywhere else?
Topic: Light & Color/Optics
Activity: Hand Lens Explorations
Level: Elementary School/Middle School
Materials (from your kit):
- One hand lens – Be sure to treat it carefully so the lens doesn’t get scratched.
Other Materials (Use your own materials):
- Collect a small amount of sand and a small amount of salt
- A piece of white paper & a piece of dark paper or a dark surface
- A light source such as a light or a bright window,
- A pencil and some paper for notes and sketches
What to do:
First, get to know your hand lens! It has two lenses, a small and a large lens. Try the two lenses out. Place the white paper on a flat surface and put a few pieces of sand on it. Put your hand lens close to your eye and look at the sand through the large lens and then the small lens. You will need to move closer or farther away for the sand to come into focus. What do you see? Is there any difference between the two lenses as you observe the sand? Sketch or write notes about what you see. Now put a few grains of salt on the dark paper or surface, and use your hand lens to look carefully at them. What do you notice? Sketch how the grains of salt look. Find more things around you to look at with your hand lens: leaves, flowers, feathers, insects, bark, rocks, words in a book or magazine, your skin or fingernails, and more! Be sure to label and make sketches of what surprises you find.
Extend:
In the above activity, you used your hand lens as a magnifying glass. It made objects look larger and they were right side up. Now you are going to use the hand lens to create an image on a piece of paper! Stand with a light or bright window behind you and have a piece of white paper or a light surface in front of you. Take your hand lens and put it between the light source and the surface you wish to project on. Move the hand lens back and forth until you project a crisp image. Is there anything unusual about the image? Be sure to sketch what you saw. Discuss.
Explain
Was the image you projected upright or upside down? Was the image smaller or larger than the object you projected?
Activity: Lens Explorations
Level: Middle School/High School
Materials:
- Hand lens
- Light source such as a lightbulb, candle, or a bright window
- Rule or tape measure
What to do:
Use your hand lens and light source to create a real image. Use these same materials to create a virtual image. Recall, a real image can be projected (the light rays actually intersect at the image). With a virtual image the light rays do not actually intersect at the image; a virtual image cannot be projected.
Explain:
Describe your process for creating the real image and the virtual image. Sketch and describe the image: Is it larger or smaller than the object (your light source)? Is it upright or inverted compared to the object?
Extend:
Using a distant light source (object), create a real image and project it. Measure the distance between the lens and the projection: this is the focal length of your lens. Your hand lens is actually made up of two lenses — a large one and a smaller one. Which of these two lenses is more powerful? What do we mean by lens power?
Activity: Magnifying Glass
Level: Middle School/High School
Materials:
- One hand lens
- Objects to look at such sand, salt, and sugar
- A dark surface and a light surface to put the object on (optional)
What to do:
First, get to know your hand lens! It has two lenses, a small and a large lens. Try the two lenses out. Put your hand lens close to your eye and look at an object through the large lens and then the small lens. You will need to move closer or farther away for your object to come into focus. Is there any difference between the two lenses as you observe? Sketch or write notes about what you see. Now look at a different object. What do you notice?
Explain
What was similar between the objects you observed with your lens? What was different? Which lens is better for looking at smaller objects? Why? Are you creating a virtual or a real image with your lens?
Extend:
Find more things around you to look at with your hand lens: leaves, flowers, feathers, insects, bark, rocks, words in a book or magazine, your skin or fingernails, and more! Be sure to label and make sketches of what surprises you find.
Topic: Magnetism
Activity: Magnet Explorations
Level: Elementary School/Middle School
Materials:
- Two ring magnets (from your LED Discovery Kit)
- A colored pencil from your Science at Home Kit or a small dowel, thin pipe cleaner, or stick
What to do:
Pull the two magnets apart and hold them near each other. Investigate the force between the two magnets.
Explain:
How does the force between the two magnets depend on the distance and angle between them? Where are the two poles of the magnets located? What is happening when they attract each other and stick together? What is going on when they push each other apart? Will the magnets attract any other objects? If so, will these other objects be attracted to both poles or only one pole? Can you make one magnet move on a table without touching the other magnet? Try making the magnets roll. Find other ways to use these two magnets. Think about and discuss.
Extend:
Make a magnet levitate! Put both magnets on the pencil such that they repel each other.
Activity: Magnet Explorations
Level: Middle School/High School
Materials:
- Two ring magnets (from your LED Discovery Kit)
- A thin pencil or other stick to place the magnets on
What to do:
Pull the two magnets apart and hold them near each other. Investigate the force between the two magnets.
Explain:
How does the force between the two magnets depend on the distance and angle between them? Where are the two poles of the magnets located? Will the magnets attract any other objects? If so, will these other objects be attracted to both poles or only one pole?
Extend:
Make a magnet levitate! Put both magnets on the pencil such that they repel each other.
Topic: Scientific Method
Activity: Color Changing Wristband Exploration
Levels: All
Materials:
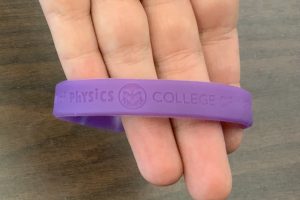
- Color changing wristband/bracelet
What to do:
The wristbands included in your kit are white, but they can turn purple. Try to discover all of the ways that they turn purple! Please do not try any experiments that will damage the wristbands or are dangerous!
Explain:
Come up with a hypothesis about when the wristbands will turn purple and when they will not. Do some things make them turn more purple or stay purple for longer? Can you think of a practical use for these bracelets? Think about and discuss.
Extend:
Get your bracelets cold by putting them in the refrigerator, freezer, or on ice. Try to turn them purple. What happens?
Topic: Scientific Method
Activity: LED Exploration Kit
Levels: All
Materials:
- One LED
- One battery
- 2 disc magnets
What to do:
This kit is all about exploration. Work with the materials and see if you can get the LED to light. Try putting the longer wire on one side of the battery. Now try putting the longer wire on the other side of the battery. How could you use the magnets with the LED light?
Explain:
What happened when you tried lighting the LED in two different ways? Why do you think it worked one way but not the other? Think about and discuss.
Extend:
Can you use the magnets to make an LED pin? Try using the LED light in other experiments!
Topic: States of Matter
Activity: Square Bubbles (Part 1)
Level: All
Materials:
- 4 pipe cleaners
- 1 straw
- From home: Scissors
- From home: Ruler
- From home: Container for bubble solution
- From home: Bubble Solution
Before you begin:
Make bubble solution:
We included several bubble recipes as they use different ingredients. There are many more online. All of them will work, so you can make a bubble solution from what you have at home! Stir gently as you don’t want to make lots of bubbles that sit on the top of the solution as these will interfere with your square bubble maker. Let the solution sit in a covered container for at least an hour before using. It will be better if you wait until the next day to use it.
- Recipe 1: 1 part liquid dish soap, 1 part corn syrup, 4 parts water
- Recipe 2: 4 cups of warm water, 1/2 cup of granulated sugar, 1/2 cup liquid dish soap. Stir the sugar into the warm water until it dissolves. Stir in the dish soap, but do this gently so you don’t create bubble foam. You can add food coloring just for fun if you like.
- Recipe 3: 1 part dish soap and 2-3 parts water
Make a bubble wand:
Use one pipe cleaner and create a bubble wand. You could make a wand in the shape of a star, a triangle, a flower, etc. Use your imagination.
Make a square bubble maker:
You will use 3 pipe cleaners for this next part. If you have a ruler, take one of the pipe cleaners and cut it into 5 pieces about 2 and 1/4 inches long. You will have a little bit of pipe cleaner left over. Repeat with the second pipe cleaner. For the 3rd pipe cleaner, cut only 2 more pieces, 2 and 1/4 inches long, and leave the long leftover piece for a handle. Now use 4 of the pipe cleaner pieces to make a flat square. You will have to twist the ends of each two pipe cleaners to make them stay together. Be careful as the ends can be sharp. Repeat. Now use the last 4 pipe cleaner pieces to connect the 2 squares together forming a cube. Attach the long pipe cleaner to one of the corners so you have a long handle. What if you don’t have a ruler? Another way you can make a square bubble maker is to just start bending a pipe cleaner into a cube shape, adding the other 2 pipe cleaners as needed. Be sure to make a handle for dipping the cube.
Activity: Square Bubbles (Part 2)
Level: All
What to do:
Pour the bubble solution into a deep container. Dip the bubble wand you made into the solution and blow some bubbles. What shape are the bubbles? Can you get a bubble to form the shape of your bubble wand?
Now, dip the cube wand you made into the bubble solution. Make sure the bubble solution is deep enough to cover all sides including the top of the cube. Bring the cube wand out of the solution and make sure there is a bubble film on all six sides of the cube. Gently shake the cube from side to side so the bubble surfaces mix together and form different shapes. You may end up with a square bubble in the middle. Dip your straw into the bubble solution and gently push your straw into the center of the cube and blow a bubble. Pull the straw out and observe. What do you notice? Try blowing several bubbles into the cube.
Explain:
What shape are the bubbles when you blow through your bubble wand? Why do you think they always form this shape? What shapes do you see inside the bubble cube? What is happening so that the bubbles can form into these different shapes? What happens if you blow a bit more air into one of the bubbles inside the cube? What happens if you take some of the air out of one of the bubbles in the cube? Think about and discuss.
Extend:
Try making all kinds of different shapes and sizes in your bubble cube. You can pop some of the shapes with your finger to see what types of bubbles are left. Do the colors you see in the bubble change over time?
Topic: States of Matter
Activity: Juggling Bubbles
Level: All
Materials:
- From home: Bubble Solution & container
- From home: Stretchy knit glove, sock, or soft fuzzy cloth
- Bubble Wand you made with one pipe cleaner in the Square Bubble activity, or items from home that you can use to blow bubbles. Search and see what you can find. Any item with a small to medium hole will work. Cutting the top off a plastic pop bottle works well for blowing bubbles.
Before you begin:
Make bubble solution:
- Recipe 1: 1 part liquid dish soap, 1 part corn syrup or sugar, 2 parts warm water
This recipe is a little different from the recipe for the square bubbles, as it uses less water. This should make the bubbles a bit stronger. Stir the sugar into the warm water so it dissolves. Now add the liquid dish soap. Stir gently as you don’t want to make lots of bubbles that sit on the top of the solution as these will interfere with the bubbles you make for juggling. Let the solution sit in a covered container for at least an hour before using. It will be better if you wait until the next day to use it.
What to do:
Put a stretchy glove or a sock on your hand. Be careful to keep the glove/sock dry as it doesn’t work well when it gets wet. Blow a bubble about the size of a baseball and gently shake it off the bubble wand. Let the bubble fall and hit your hand. Immediately, bounce the bubble out of your hand. You are now juggling a bubble! Keep juggling and observe the interesting things that happen. If the bubble sits too long on your glove or hand, it will make the glove wet and soapy and won’t work anymore until you wash and dry it.
Explain:
Why do individual bubbles always form a sphere? Think about and discuss.
Extend:
Try other fabrics to see what works for juggling. Put on 2 gloves or socks and juggle with two hands. Have a friend put on a glove and then you can juggle the bubble back and forth with each other. Study the colors in the bubble. Do they change over time? Can you tell when the bubble will pop? Can you get two bubbles to form one big bubble as you juggle?
Topic: Waves and Sound
Activity: Talking Strips
Level: All
Materials:
- One red talking strip attached to a card
What to do:
Hold the card in your left hand with the red strip on top. With your right hand, grab the red plastic strip gently near the card and pull down so the card bends slightly, but doesn’t fold. Slide your thumbnail lightly down the ridged side of the strip. Do you hear anything? The card is talking to you! It says, Little Shop of Physics. Getting it to talk may take some practice, but just keep trying!
Explain:
We recorded the sound of someone in Little Shop saying “Little Shop of Physics”. A company then recorded the pattern of the vibration on the plastic strip. Why do you think we can hear the words when you run your thumbnail over the ridges? Think about and discuss this.
Extend:
Try sliding your thumbnail quickly down the strip. Now slide it slowly. Do they sound different from each other? Why? Take the strip carefully off the card and attach the pointed end to other items. Try lots of different objects, such as a table, balloon, cup, or a large piece of cardboard. Take the pointed end of the strip, bite it between your front teeth, and pull your nail down the ridged side. The vibration will go through your teeth and bones to your ears, without going through the air. The sound is all in your head! Could anyone else hear it?
Topic: Waves and Sound
Activity: Straw Flute
Level: Elementary School/Middle School
Materials:
- One straw
- From home: Pair of Scissors
What to do:
Note of caution: Be sure to not bend the straw, or this experiment won’t work.
Use your thumb or finger to press down on one end of the straw several times to make it more flat. Another way you can flatten the straw is by putting one end of the straw in your mouth and biting down as you pull the straw out. Do this several times until the straw is flat on one end. Carefully use a pair of scissors to cut the same size pieces off both sides of the flattened end of the straw. You want to cut it into a point like the tip of an arrow or pencil. Now put the pointed ends of the straw in your mouth, press and seal your lips on it, and blow. You should hear a funny sound. If you don’t hear a sound, try blowing harder or softer. Also try changing how tightly your lips are pressing on the straw. You may need to move the straw back and forth into or out of your mouth. Don’t get discouraged. This takes practice to make it work.
Explain:
What happens when you blow through the pointed end of the straw? Why do you hear a noise? Do you feel any vibrations? What do vibrations have to do with sound? Think about and discuss.
Extend:
What would happen if you cut your flute shorter? Do you think the sound would change? Try putting a slightly bigger straw over the end of your flute so it can be longer. Slide the extra straw closer to your lips and then slide it farther away. How does the sound change? If you have more straws, make more flutes and cut them to different lengths and explore.
Activity: Straw Flute
Level: Middle School/High School
Topic: Waves and Sound–Vibrations, Pitch, Standing Wave
Materials:
- One or more straws
- Scissors
What to do:
Use your thumb or finger to press down on one end of the straw several times to make it more flat. Another way you can flatten the straw is by putting one end of the straw in your mouth and biting down as you pull the straw out. Do this several times until the straw is flat on one end. Use a pair of scissors to cut a point into one end of the straw like an arrow or the tip of a pencil.
Put the pointed end of the straw in your mouth, press and seal your lips on it, and blow. You should hear a funny sound. If you don’t hear a sound, try blowing harder or softer. Also try changing how tightly your lips are pressing on the straw. You may need to move the straw back and forth into or out of your mouth. Don’t get discouraged. This takes practice to make it work.
Explain:
What happens when you blow through the pointed end of the straw? Why do you hear a noise? Do you feel any vibrations? When making a sound, try touching your tongue to the point on the straw.
Extend:
What happens to the sound if you cut your flute shorter? Try putting a slightly bigger straw over the end of your flute so it can be longer. Slide the extra straw closer to your lips and then slide it farther away. How does the sound change? If you have more straws, make more flutes and cut them to different lengths and explore.


